Contractor Onboarding Checklist: U.S. Audit Ready, Classification First
Contractor Onboarding Checklist: U.S. Audit Ready, Classification First

Before any independent contractor touches a project, three gates must close: classification documented with a reason on file, a signed Independent Contractor Agreement or SOW in hand, and a completed W-9 with payment method confirmed. Skip any one of these and you’re exposed to misclassification penalties, backup withholding, or a payment dispute with no paper trail. Order matters because each gate depends on the last.
TL;DR:
- Proper classification must be documented with specific answers to IRS or state criteria and stored separately from the contract to prevent liability issues.
- Signing the independent contractor agreement and W-9 collection are mandatory before any work begins, with clear, written change processes for scope modifications.
- System access should be granted with the principle of least privilege, with explicit expiry dates and proper deprovisioning after offboarding to avoid security risks.
- Collecting insurance and licenses is essential for onsite or regulated work, with reminders set for renewals to prevent lapses that could weaken contractual protection.
- Automating onboarding documentation using integrated platforms reduces errors, delays, and missing records, especially when managing multiple contractors at scale.
Table of Contents
- Building a Contractor Onboarding Checklist That Doesn’t Skip Steps
- Confirm Classification Before Anything Else Gets Signed
- What Belongs in the Independent Contractor Agreement and SOW
- Getting Tax Paperwork and Payments Right From Day One
- Setting Up System Access Without Creating a Security Hole
- What a Strong Kickoff Covers in the First 30 Days
- Verifying Insurance, Licenses, and Background Before Work Starts
- Closing Out Onboarding and Keeping Records Straight
- The One-Page Runbook You Can Copy Into Your Intake Form
- Orientation That Matches the Actual Contractor Role
- Health and Safety Rules That Apply to Contractors, Not Just Employees
- Handling Scope Changes Without Redoing the Whole Contract
- Publisher Perspective: How MyBizApps Operationalizes the Checklist
- Automating the Paperwork So You Can Focus on the Work
- Sources
- FAQ
Building a Contractor Onboarding Checklist That Doesn’t Skip Steps
A contractor onboarding checklist only works if someone owns each piece of it. Hiring managers typically drive intake and kickoff, legal reviews contracts, finance handles W-9 and 1099 tracking, and IT manages access provisioning. Splitting ownership this way prevents the common failure mode: one person trying to remember everything and missing the paperwork until tax season.
Not every engagement needs the full packet. A one-off project with a freelance designer doesn’t require the same rigor as a longer contract with a data-access requirement. Use a reduced version for low-risk, low-value work, and the full version whenever there’s system access, ongoing scheduling, or payments likely to require reporting.
- Log completion dates for each gate in a shared tracker, not someone’s inbox
- Never let a contractor start work before classification and the signed agreement are both on file
- Flag exceptions (rush projects, referrals) for manager sign-off instead of silently skipping steps
Confirm Classification Before Anything Else Gets Signed
Classification is the gate that protects you most. A contractor who looks like an employee on paper (set hours, provided equipment, ongoing exclusive work) creates liability regardless of what the contract says. The Department of Labor’s wage and hour guidance makes clear that misclassification enforcement looks at the actual working relationship, not the label on the paperwork.
Walk through the IRS common-law factors, or your state’s ABC test if it applies, and write down the answers. Who sets the schedule? Who supplies tools and workspace? Is the work part of your core business or a distinct outside service? A signed declaration from the contractor saying they’re an independent contractor is rarely enough on its own to survive an audit, according to FileRequestPro’s onboarding guidance.
- Document the specific test used and each factor’s answer, not just a checkbox
- Note red flags explicitly: fixed daily hours, company email address, sole reliance on you for income
- Store the rationale in the contractor’s file, separate from the contract itself
Pro Tip: Revisit classification whenever a contractor’s scope expands. A part-time project that quietly grows into 40 hours a week of exclusive work is the exact pattern auditors look for.
What Belongs in the Independent Contractor Agreement and SOW
The Independent Contractor Agreement and the Statement of Work are the two documents that carry the legal weight of the relationship. The ICA establishes the nature of the engagement (independent status, no benefits, contractor covers their own taxes); the SOW nails down what gets delivered and by when. FirstHR’s compliance checklist lists a signed agreement, W-9, and payment instructions as baseline requirements before any work begins.
A solid packet includes:
- Scope of work and specific deliverables, not vague descriptions
- Acceptance criteria for what counts as “done”
- Intellectual property assignment, so ownership of the work product is unambiguous
- Confidentiality and data handling terms
- Termination conditions and notice period
- Governing law and dispute resolution
Use e-signature tools and keep version history so you’re never guessing which draft someone actually signed. For six-figure contracts or anything touching sensitive data, get an attorney to review the template once. That review pays for itself the first time a dispute lands on your desk.
Getting Tax Paperwork and Payments Right From Day One
Collect the W-9 before the first payment goes out, not after. If a contractor doesn’t provide one, or the taxpayer ID doesn’t check out, you’re required to apply backup withholding at 24% as of 2026, which is a painful correction to make retroactively. Foreign contractors need a W-8 series form instead, since W-9 collection only applies to US persons.
Backup withholding at a glance: miss a valid W-9 or TIN match, and the IRS requires you to withhold 24% of every payment to that contractor until the paperwork is corrected. That’s real cash pulled out of a contractor’s payment, and it’s an awkward conversation to have after the fact.
Track cumulative payments to every contractor throughout the year. Once total payments hit $600, you owe them a 1099-NEC by January 31 of the following year, per FirstHR’s guidance on 1099 thresholds. A spreadsheet works for a few contractors; it becomes impractical as the number grows larger.
Nail down the payment mechanics at the same time you collect tax paperwork:
- Agree on invoice format upfront, so contractors aren’t guessing what you need
- ACH is generally faster and cheaper to reconcile than paper checks
- Set explicit payment terms appropriate to the engagement, such as shorter terms for smaller or trusted vendors, and longer terms for larger engagements.
- Confirm the payment method works before the first invoice, not after it bounces
Setting Up System Access Without Creating a Security Hole
Contractors need enough access to do their job and nothing more. Every account you create for someone outside your company is a liability the moment their contract ends, and lingering access after offboarding is one of the most common security failures companies never notice, according to FirstHR’s research on contractor access.
- Grant least-privilege access using guest or external-collaborator roles wherever your tools support them, rather than full internal accounts.
- Set an explicit expiry date on every credential, tied to the contract end date or a specific milestone, not “until someone remembers to remove it.”
- Record who requested each access grant and why, so there’s a name attached when you’re reviewing permissions six months later.
- Confirm deprovisioning happened at offboarding, don’t assume it did.
For file storage, use shared folders scoped to the project, not the whole drive. For project management tools, add contractors as guests rather than full members. For chat platforms, use external-guest channels instead of full workspace access. Remote contractors add another layer of risk here, and guidance on secure remote hiring practices is worth a look if you’re provisioning access across time zones.
What a Strong Kickoff Covers in the First 30 Days
A kickoff call isn’t a formality. It’s where you set the expectations that prevent the “that’s not what I thought you meant” conversation three weeks later. Cover the outcomes you need, the milestones along the way, what counts as an acceptable deliverable, how often you’ll communicate, and who the contractor escalates to if something blocks them.
Hand over materials before day one if you can, not during it:
- Brand guidelines or style requirements relevant to the work
- One or two examples of deliverables you consider “good”
- Any QA checklist, code style guide, or review process specific to the role
- A named point of contact for questions, not a generic inbox
Set a measurable 30-day goal, something concrete enough that both sides know whether it happened. Then build in a short check-in at the two-week mark rather than waiting for the goal date to find out something went sideways. Turning ad-hoc requests into tracked work tickets instead of scattered chat messages keeps this whole process visible instead of buried in someone’s inbox.
Verifying Insurance, Licenses, and Background Before Work Starts
Not every contractor needs a certificate of insurance, but some absolutely do. Anyone working onsite, in a licensed trade, or handling sensitive data needs a COI and, where applicable, a current professional license verified before their first day. State consumer-protection guidance consistently recommends confirming licenses and insurance and keeping a job file with the supporting documents, per Connecticut’s Department of Consumer Protection.
- Contact the insurer directly to confirm the policy is active, not just the certificate date
- Use your state’s license lookup tool for regulated trades (electrical, plumbing, HVAC, and similar)
- Run background checks for roles involving data access, minors, or financial systems
- Keep expiration dates in a calendar with alerts, not in the original file you’ll forget to reopen
Pro Tip: Set a 30-day-before-expiration reminder on every COI and license. Chasing a lapsed certificate after work has already started puts you in a much weaker negotiating position.
For construction and trade work specifically, a contractor verification checklist covering licensing and insurance due diligence adds another layer of protection before a contract is signed.
Closing Out Onboarding and Keeping Records Straight
Before a contractor’s first invoice gets approved, confirm every gate above is actually closed, not “mostly done.” Mark onboarding complete in whatever system you track it, so there’s no ambiguity about whether work was authorized to start.
- Confirm classification documentation, signed agreement, W-9, and required insurance are all on file.
- On contract end, revoke system access immediately and collect any company assets or credentials issued.
- Reconcile the final invoice and confirm payment before closing the contractor’s file.
- File the 1099-NEC by January 31 for anyone paid $600 or more during the year, and retain onboarding and payment records for at least four years in case of audit, a retention window FirstHR recommends as a baseline.
A structured intake to activation workflow, the kind described in Moxo’s contractor onboarding research, consistently reduces the delays and dropped steps that come from managing this by memory.
The One-Page Runbook You Can Copy Into Your Intake Form
Print this, paste it into your project intake tool, or turn it into a form field. Every gate should read yes or no, nothing in between. If any item is “no,” work does not start.
| Gate | Status required before start |
|---|---|
| Classification documented | Yes, with rationale on file |
| Agreement / SOW signed | Yes, both parties |
| W-9 (or W-8) on file | Yes |
| Payment method confirmed | Yes |
| Access provisioned (least privilege) | Yes, with expiry date set |
| COI / license verified (if applicable) | Yes |
| Kickoff scheduled | Yes |
- Treat this as a hard gate, not a suggestion: no work authorization until every “yes” is checked
- Assign one owner to sign off on the full sheet before the contractor’s first day
- Store the completed runbook with the contract for your audit file
Orientation That Matches the Actual Contractor Role
Generic orientation wastes everyone’s time. A contractor writing marketing copy doesn’t need the same onboarding as one installing equipment onsite, and treating them identically means the equipment installer misses safety protocol while the copywriter sits through irrelevant material.
Build role-specific tracks instead. For remote and knowledge-work contractors, orientation should cover your communication tools, file organization conventions, review and approval workflows, and who to contact for what. For onsite or field contractors, orientation needs to cover site-specific safety procedures, equipment protocols, and check-in requirements before those broader tracks even apply.
Keep the material short and reusable. A one-page reference sheet per role type, updated when your processes change, beats a lengthy onboarding deck nobody rereads after week one. Include:
- The specific tools they’ll use and login instructions (tied to the access already provisioned)
- Who approves their work and how feedback gets delivered
- Any recurring meetings or check-ins they’re expected to join
- Where to find examples of acceptable finished work for their specific role
For contractors handling client-facing work, add a short briefing on your brand voice and customer communication standards. This isn’t about making them employees. It’s about making sure the eventual output looks consistent, whether five different contractors touched it or one person did.
Revisit orientation materials every time your tools or processes change. An orientation packet referencing software you retired eighteen months ago signals disorganization before a contractor even starts their first task.
Health and Safety Rules That Apply to Contractors, Not Just Employees
Contractors working on your premises or using your equipment fall under many of the same safety obligations as employees, even though they’re not on payroll. Businesses that treat onsite contractors as somehow exempt from safety protocol are taking on liability they don’t need.
If a contractor is doing physical work on your property, whether that’s installation, repair, or maintenance, walk them through site-specific hazards before they start: emergency exits, protective equipment requirements, restricted areas, and who to notify if something goes wrong. Document that this briefing happened. A signed acknowledgment takes two minutes and matters enormously if there’s ever an incident.

For contractors in regulated trades (electrical, construction, HVAC), confirm they carry their own required safety certifications and that their work complies with relevant codes, separate from any general orientation you provide. This overlaps with the license verification covered earlier, but it deserves its own gate specifically for the safety dimension, not just the legal-to-operate dimension.
Remote contractors aren’t exempt from a safety conversation either, even though the risks look different. If you’re shipping equipment to a home office, or a contractor is handling client visits offsite on your behalf, spell out expectations for reporting incidents or hazards they encounter while representing your business.
Build a simple rule: any contractor doing physical or onsite work gets a documented safety briefing before their first day, with a signed acknowledgment stored alongside their contract. It’s a small addition to the onboarding packet, and it closes a gap that a lot of small businesses only notice after something goes wrong.
Handling Scope Changes Without Redoing the Whole Contract
Scope creep is where a lot of contractor relationships go sideways. The original SOW said one thing, three weeks in the client wants something bigger, and nobody wrote it down. Now there’s a dispute over what was agreed and what should cost extra.
Build the amendment process into the original agreement, not as an afterthought once a change actually happens. A simple structure works: any change to deliverables, timeline, or payment gets documented in a written change order, referencing the original SOW section it modifies, signed by both parties before the new work starts.
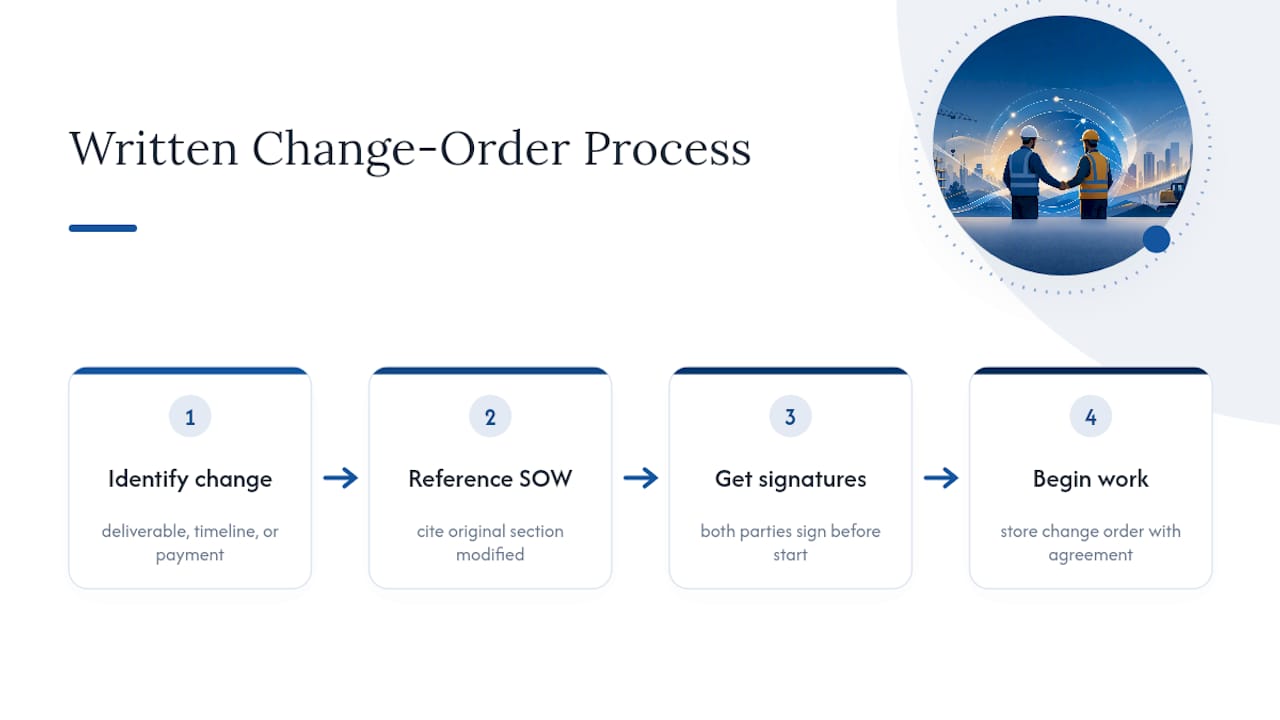
Keep the change order short. It doesn’t need to be a new contract, just a clear record: what’s changing, why, the revised timeline or deliverable, and any payment adjustment. Store it with the original agreement so anyone reviewing the file later sees the full history in one place.
Set a threshold for when a change needs a full amendment versus a quick email confirmation. A minor deadline shift might just need written sign-off in an email thread. A change that adds significant scope or budget should go through the same signature process as the original agreement. Define that threshold upfront so contractors and hiring managers aren’t guessing case by case.
The biggest mistake here isn’t allowing scope changes. It’s letting them happen verbally, on a call or in a hallway conversation, with nothing in writing. When payment disputes happen, they almost always trace back to a change that was agreed to informally and never documented.
Publisher Perspective: How MyBizApps Operationalizes the Checklist
Most of the failures in contractor onboarding aren’t legal complexity. They’re logistics: the W-9 that got lost in an email thread, the invoice format nobody agreed on, the access nobody revoked. Some companies keep customer records, quotes, invoices, scheduling, and checklists under one login specifically so those handoffs don’t disappear between tools. An intake form that flows into document storage, then into access tracking, then into a kickoff checklist, means fewer missing W-9s and faster invoicing because the payment details were confirmed before day one, not chased down after.
— Philip
Automating the Paperwork So You Can Focus on the Work
Running this checklist manually across a spreadsheet, an email inbox, and a filing cabinet works fine for two contractors. It falls apart at ten. Every gate in this guide, classification notes, signed agreements, W-9 status, access records, invoice terms, lives in a different place unless something ties them together.
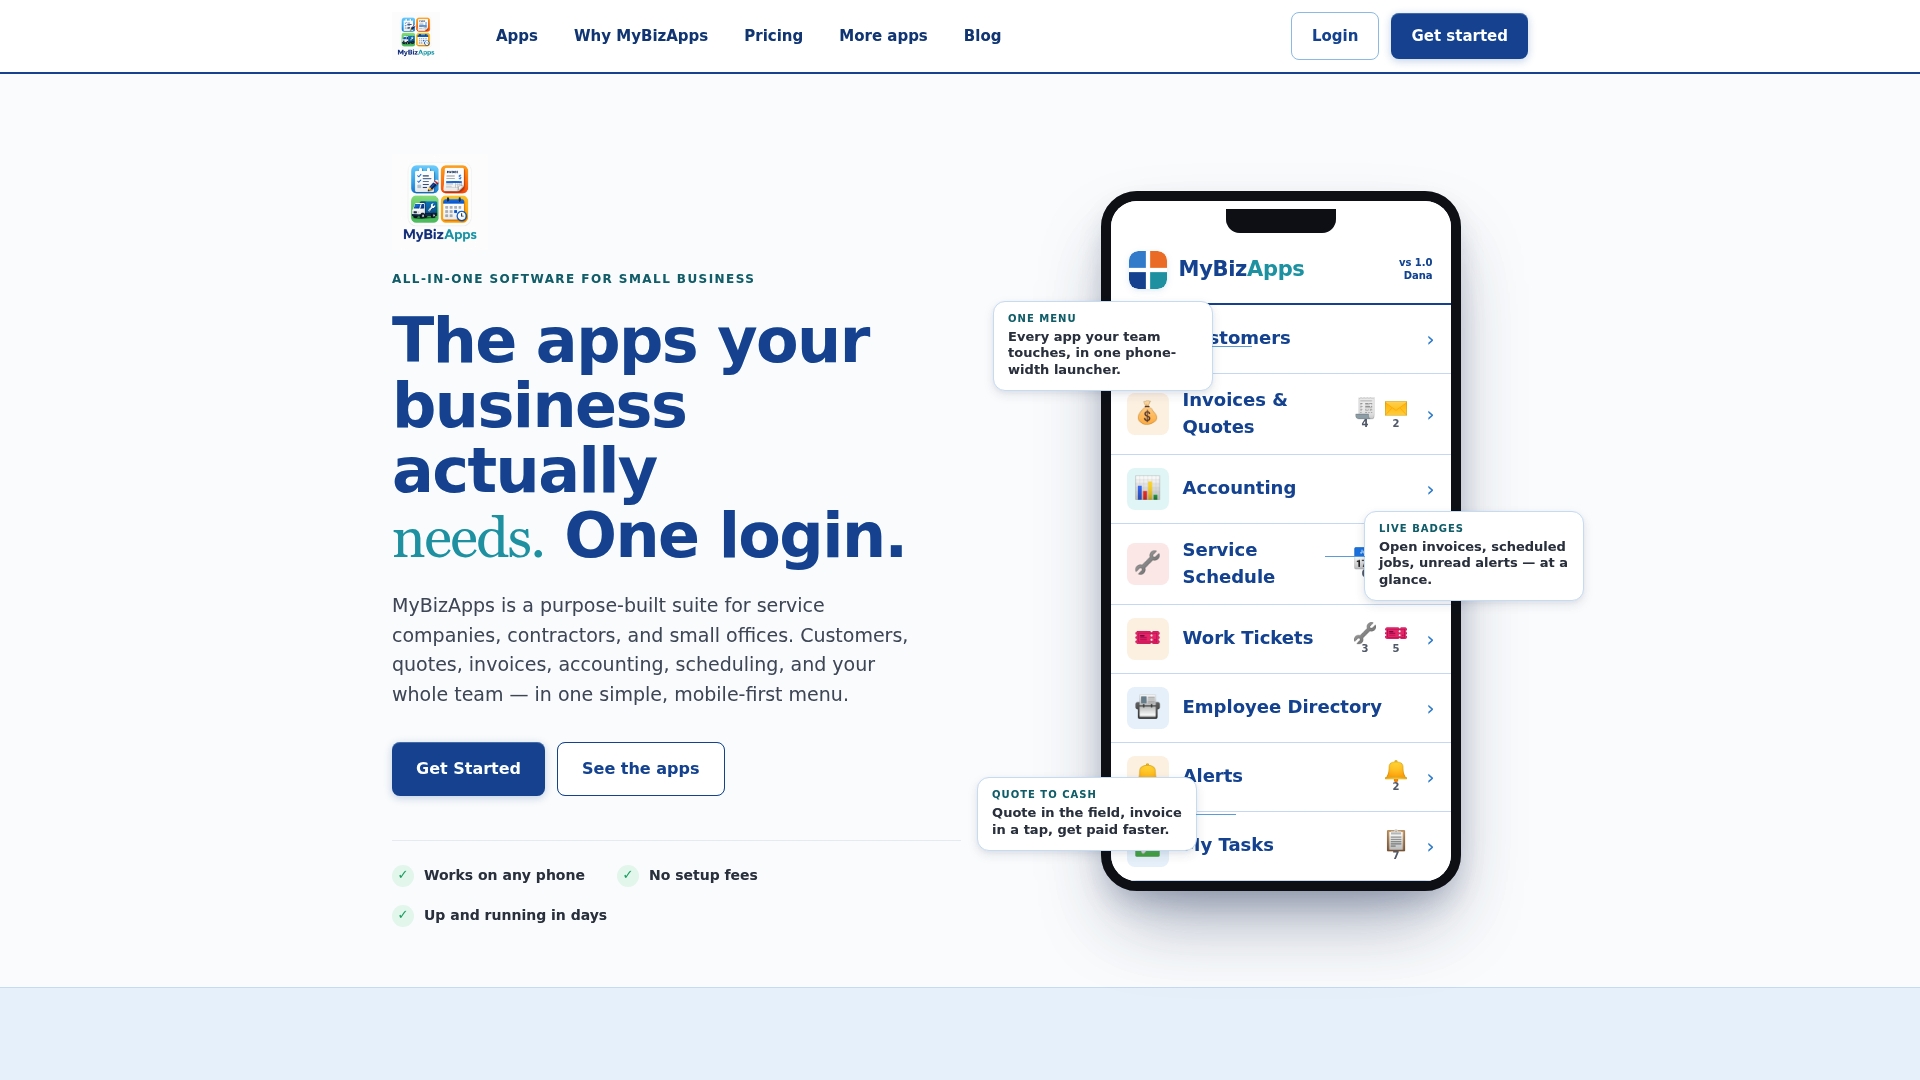
Some platforms centralize customer and contractor records, quote and invoice creation, scheduling, and checklists under a single mobile-first login, so the documentation gate and the payment gate stop living in separate systems. Instead of hunting through email for a signed SOW while an invoice sits unpaid, everything sits in one place, accessible from the field. Compare that to a manual process next time you’re setting up a new contractor: how many tabs, folders, and reminders does it currently take? Check the MyBizApps price sheet to see which plan fits the number of contractors you’re managing, and whether the add-on modules for invoicing or scheduling make sense for your setup.
Sources
- Contractor onboarding checklist — FileRequestPro
- Contractor Onboarding: Checklist and Compliance | FirstHR
- Checklist before you hire a contractor — Connecticut DCP
FAQ
What are the 5 C’s of onboarding?
Different sources define this differently, but the version most relevant to contractors covers compliance, clarification of role, culture and communication norms, connection to the team, and check-ins on performance.
What should be included in a contractor onboarding checklist?
At minimum: documented classification rationale, a signed Independent Contractor Agreement or SOW, a completed W-9, confirmed payment terms, least-privilege system access with an expiry date, and verification of any required insurance or licenses.
How do I onboard a contractor?
Confirm classification and document the reasoning, get the agreement and W-9 signed before any payment, provision only the access needed with a clear expiration, then run a kickoff covering deliverables, milestones, and communication cadence.
What is the 30 60 90 onboarding process?
It’s a framework for setting goals in the first 30 days of an engagement, typically starting with foundational tasks and ramping to independent, measurable output; it works well as a layer on top of the core compliance checklist covered here.
Do I need a W-9 before paying a contractor?
Yes. Collect the W-9 before the first payment, since a missing or invalid taxpayer ID triggers 24% backup withholding on payments until the paperwork is corrected.