Supervisors: Six Daily Job Site Checklist Items With Mobile Follow Up
Supervisors: Six Daily Job Site Checklist Items With Mobile Follow Up
A job site checklist is a written, repeatable inspection routine that catches hazards before they cause an incident. Every shift, a competent person should verify six things: PPE condition, fall protection, scaffolding tags, equipment pre-op status, temporary electrical/GFCI protection, and housekeeping around walkways and access points. Run that check daily, expand it into a full audit weekly, and layer in specialized checks for trenching, electrical work, or heavy equipment whenever those activities are scheduled.
TL;DR:
- Daily checklists should consistently verify PPE, fall protection, scaffold tags, equipment condition, GFCI tests, and housekeeping to catch hazards early.
- Weekly audits must review power systems, erosion control, inspection records, training files, and fire safety, documenting who inspected, when, and referencing OSHA standards.
- Specialized pre-shift checks for scaffolding, trenches, electrical, and heavy equipment are crucial for high-risk tasks, each requiring a competent-person sign-off.
- All hazards identified must be tracked with photos, assigned owners, specific references, and due dates to ensure timely corrective actions.
- Digital inspection systems streamline documentation, prevent hazards from slipping through, and automatically generate work tickets to address issues before work commences.
Table of Contents
- Daily Pre-Shift Jobsite Checklist: Your Morning Route
- Weekly Site Audit and Documentation Requirements
- Specialized Checks: Scaffolding, Trenching, Electrical, and Heavy Equipment
- Documenting Findings and Closing Out Corrective Actions
- Turning Paper Checklists Into a Mobile Inspection Routine
- What Twenty Years on Job Sites Teaches You About Checklists
- Build Your Checklist Once, Run It Every Shift With MyBizApps
- Where to Find Official Checklists and Templates
- Sources
- FAQ
Daily Pre-Shift Jobsite Checklist: Your Morning Route
The most effective supervisors walk the same route every single morning, in the same order, before the first crew member picks up a tool. Consistency matters more than speed here. A random walkthrough misses things; a fixed route trains your eye to notice what’s different from yesterday.
Arrive before crews start, allowing enough time to walk the site and flag issues before work begins. That window gives you enough time to walk the site, flag issues, and still hold a quick toolbox talk if something needs immediate correction. Here’s the order that catches the most problems the fastest:
- PPE check at the gate. Confirm hard hats, safety glasses, high-visibility vests, and gloves are present and undamaged before anyone steps past the entry point.
- Fall protection spot-check. Inspect harnesses and lanyards for fraying, cracked D-rings, or webbing damage. A harness that failed a drop test last month doesn’t belong on site today.
- Scaffold tag verification. Look for the current competent-person tag (green for safe to use, yellow for restricted, red for do not use) posted at access points.
- Tool and equipment condition. Check cords, guards, and blades on powered tools; anything with exposed wiring or a missing guard gets pulled from service on the spot.
- Temporary power and GFCI test. Push the test button on every GFCI outlet or portable unit in use. If it doesn’t trip, it doesn’t get used.
- Housekeeping and access routes. Clear walkways, stairways, and emergency exits of debris, cords, and materials that create trip hazards.
Anything that fails inspection triggers an immediate stop-work order for that specific task or area, not the whole site. Photograph the hazard before you touch it, note the location and time, and hold the crew back until it’s corrected.
Pro Tip: Name your photo files with a consistent format, like “2026-03-12_scaffold-tag-eastwing.jpg,” and add a one-line caption in the moment. Six months from now, when an inspector or insurance adjuster asks for records, you’ll find the right photo in seconds instead of scrolling through a camera roll of unlabeled images.
Weekly Site Audit and Documentation Requirements
A daily walkthrough catches the obvious. A weekly audit catches the things that develop slowly, like a temporary power distribution box that’s been overloaded for a week or erosion control measures that failed after last night’s rain.
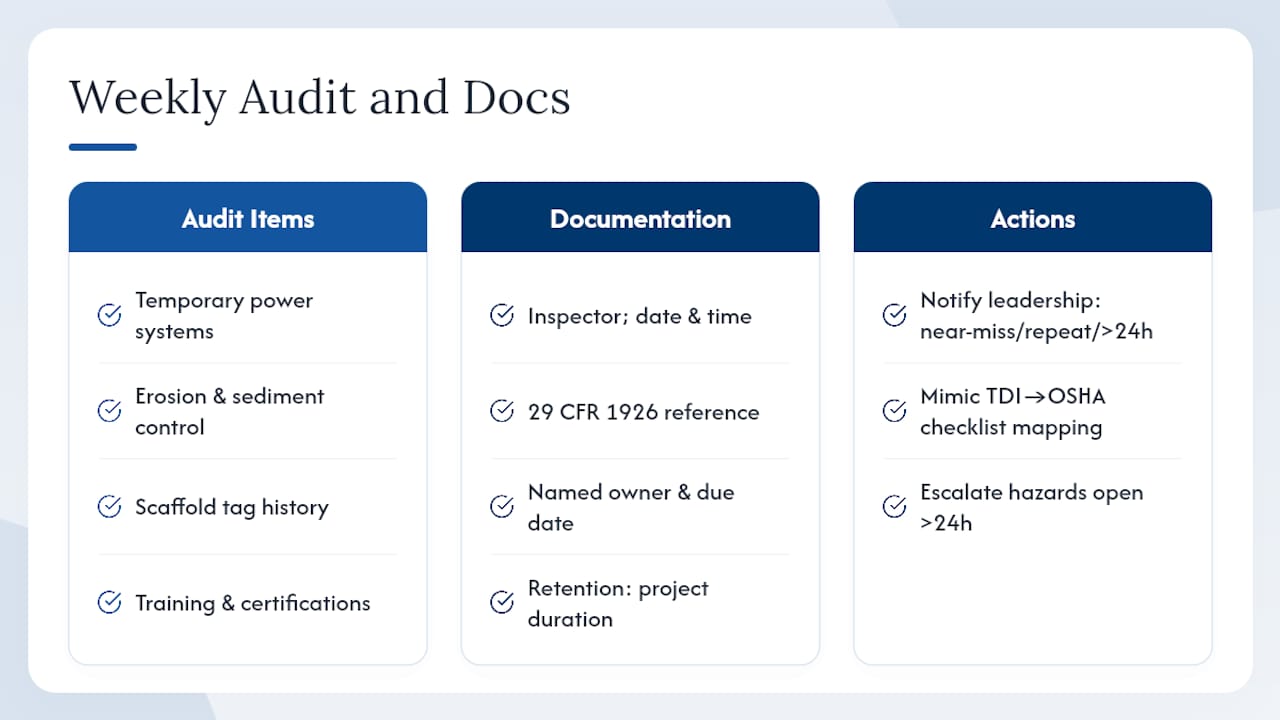
Your weekly audit should cover temporary power systems (grounding, breaker capacity, weatherproofing), erosion and sediment control, the full history of scaffold inspection tags rather than just the current one, training and certification records for anyone operating equipment or performing high-risk work, and fire protection equipment plus posted emergency evacuation routes.
Documentation needs four things to hold up under scrutiny: who inspected it, the date and time, a specific reference to the relevant 29 CFR 1926 provision when the finding ties to a known standard, and a named owner with a due date for correction. The Texas Department of Insurance’s inspection checklist maps its line items directly to those OSHA standards, which is worth mimicking even if you build your own form.
Keep records for at least the duration of the project, and longer if your company’s insurance carrier or corporate safety office requires it. Anything involving a near-miss, a repeat violation, or a hazard that’s been open more than 24 hours should go straight to project leadership rather than wait for the next scheduled review.
Specialized Checks: Scaffolding, Trenching, Electrical, and Heavy Equipment
Some activities carry enough risk that a general walkthrough isn’t enough. These four categories account for a large share of serious construction incidents, and each one needs its own short, focused check before work begins.
- Scaffolding: A competent person must inspect it before each work shift, verify guardrails are intact, check that planking shows no cracking or excessive deflection, and confirm posted load limits match what’s actually stacked on the platform.
- Excavation and trenching: Confirm protective systems (shoring, sloping, or shielding) are in place for trenches five feet deep or greater, check that spoil piles sit at least two feet back from the edge, verify egress ladders are placed within 25 feet of workers, and get a daily competent-person sign-off before anyone enters.
- Electrical: Test GFCI protection on every temporary circuit, inspect cords and equipment for damage, and verify lockout/tagout procedures are active on any circuit being serviced.
- Heavy equipment: Complete a pre-operation inspection on every machine, confirm the operator holds current credentials for that specific equipment class, and establish exclusion zones with a dedicated spotter for any blind-spot maneuvering.
The Fatal Four hazards, falls, struck-by incidents, electrocutions, and caught-in or caught-between injuries, account for most construction deaths, and three of the four categories above map directly onto them. That’s not a coincidence; it’s why regulators and safety researchers keep pointing at the same short list.
Use a formal sign-off with a paper or digital signature for anything requiring a competent-person designation under OSHA, trenching, scaffolding erection, and crane operations among them. A quick visual check without sign-off is enough for lower-risk daily confirmations, like verifying a GFCI still trips or a walkway is still clear.
Documenting Findings and Closing Out Corrective Actions
A checklist that identifies a hazard but never tracks it to resolution isn’t really a safety program. It’s paperwork. Every finding needs a short, specific description (not “electrical issue” but “exposed wire, junction box near column C4”), a reference to the applicable OSHA provision when one applies, an assigned owner, and a due date.
Classify each item by urgency. Stop-work items halt the task immediately. Twenty-four-hour items need correction before the next shift starts. Standard items get scheduled into the normal workflow without shutting anything down.
Require a photo at both discovery and close-out, with a timestamp on each. That before-and-after pair is what actually proves the fix happened, rather than someone marking a box and moving on. Keep every record in one system rather than split between a clipboard, a group text, and someone’s phone camera, because that’s exactly where corrective actions go to die.
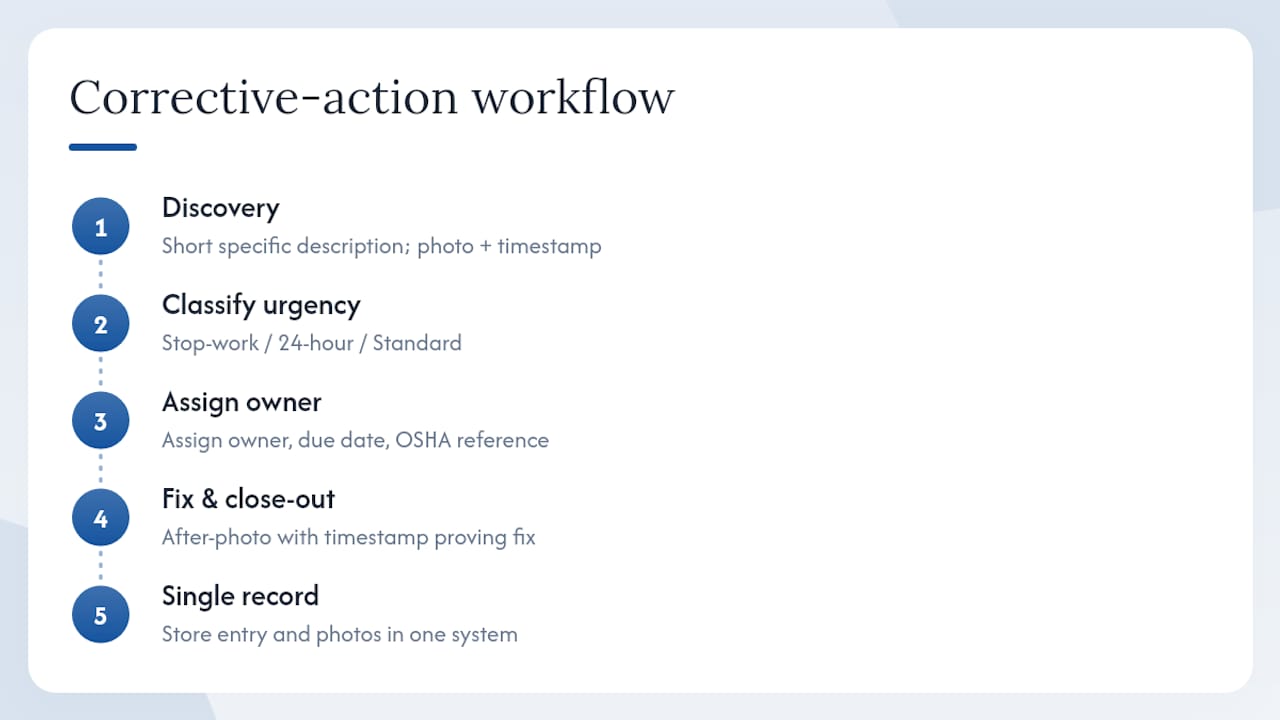
A simple entry might read: Location: Scaffold, east elevation, Level 3. Hazard: Missing guardrail. Reference: 1926.451(g). Owner: Site foreman. Due: End of shift. Photo: Attached.
Turning Paper Checklists Into a Mobile Inspection Routine
Converting a paper form into a digital workflow follows a simple path: build one master template covering every standard item, customize it per project phase (excavation items disappear once the foundation is poured, roofing items appear when framing wraps up), then schedule it to recur automatically on a daily and weekly cadence.
The operational payoff shows up quickly:
- Photo attachments turn a vague note into evidence anyone can review later, including inspectors.
- A single login means the full inspection history, work tickets, and scheduling live in one place instead of three separate systems.
- Linking an inspection finding directly to a work ticket means a scaffold guardrail issue automatically becomes an assigned, tracked repair job rather than a line item that gets forgotten by Friday.
Set required fields so a shift can’t be marked complete with blank answers, and build in a reminder cadence that pings the responsible supervisor if a scheduled inspection hasn’t been logged by mid-morning.
What Twenty Years on Job Sites Teaches You About Checklists
The supervisors who avoid serious incidents aren’t the ones with the longest checklists. They’re the ones who walk the exact same route every morning and never skip the photo, even when the fix takes thirty seconds. A caught GFCI that won’t trip, documented and swapped before the first tool plugs in, prevents the incident report nobody wants to write. Consistency beats thoroughness on paper every time. A crew leader who follows up on a toolbox talk item the next day, instead of assuming it stuck, catches the drift back to bad habits before it becomes routine.
— Philip
Build Your Checklist Once, Run It Every Shift With MyBizApps
Paper checklists get lost, photos live on someone’s personal phone, and a hazard flagged Tuesday morning has a way of disappearing by Thursday. This software closes that gap by putting your inspection template, photo capture, and corrective-action tracking behind one mobile login, so a scaffold tag issue found during a pre-shift walk becomes an assigned work ticket before the crew even starts.

A supervisor doing a morning walkthrough opens the checklist on a phone, photographs a damaged guardrail, and the system generates a tracked work ticket with an owner and due date automatically, no separate call to the office, no sticky note that gets lost by lunch. Scheduling and invoicing run through the same login, so the fix gets assigned to the right crew without a second system to check. Review the pricing and plan details to see which tier fits your crew size and start running your next inspection digitally.
Where to Find Official Checklists and Templates
For a ready-to-use starting point, the Texas Department of Insurance’s construction safety inspection checklist offers a fillable PDF cross-referenced to OSHA standards. The North Carolina Department of Labor publishes downloadable, customizable checklists by trade. NIOSH’s construction program covers prevention guidance behind many of these items, and MapTrack’s free OSHA-style templates cover fall protection, scaffolding, and electrical sections in one document. For a broader look at recurring inspection templates outside construction, Bespoke Environmental’s site management guide shows how the same recurring-checklist logic applies to pest control and site upkeep.
Sources
- Construction Safety Inspection Checklist (Texas Department of Insurance / TDI)
- Construction (NIOSH / CDC)
- Peer-reviewed article on supervisory inspections and safety outcomes (PMC)
FAQ
What are the OSHA requirements for jobsites?
OSHA requires employers to maintain jobsite conditions that comply with 29 CFR 1926, the construction standard covering fall protection, scaffolding, electrical safety, and excavation, with a competent person responsible for regular inspections.
What are some good job checklists?
Strong checklists cover daily pre-shift items (PPE, fall protection, scaffolding tags, equipment, electrical, housekeeping), a weekly audit of temporary power and training records, and specialized forms for trenching, electrical work, and heavy equipment. Digital platforms like Mybizapps let you build one master template and customize it per project.
What should I include in a site visit checklist?
Include PPE and fall protection status, scaffold and equipment condition, active hazard identification, housekeeping and access routes, and a section for photo evidence and corrective-action assignment with owners and due dates.
What is the 20-20-20 rule in construction safety?
There’s no single standardized “20-20-20 rule” recognized across OSHA or major safety authorities; if you’ve seen the term, it likely refers to a specific employer’s internal policy rather than a universal industry standard, so check with your own safety program for its definition.